如何通过PS去除照片水印、衣服上图案或文字?

例1

例2
去除简单水印
工具
1.“画布大小”
位置:“图像”/“画布大小”(alt+ctrl+c)
作用:修改画布的宽度为两个原图的宽度,可通过“画布大小”或“照片尺寸”查看原图照片尺寸。
2.“填充”
位置:“编辑”/“填充” (shift+F5)
作用:“填充”对话框的“内容识别”(“内容识别”基于选区实现的),通过识别选区周围的图像或选区偏内部一点,填充到选区内部。
具体步骤
a.复制背景(ctrl+j);
b.使用“套索工具” 绘制封闭选区;
c.“编辑”/“填充”(或shift+F5),弹出填充对话框,选择“内部识别”/“确定”;
d.ctrl+d(取消选区);

效果图(已完美去除水印)

将两图并列为一张图
1.复制原图(ctrl+j)
2.查看原图尺寸,并添加新图层,画布高度与原图一致,画布宽度为原图两倍。


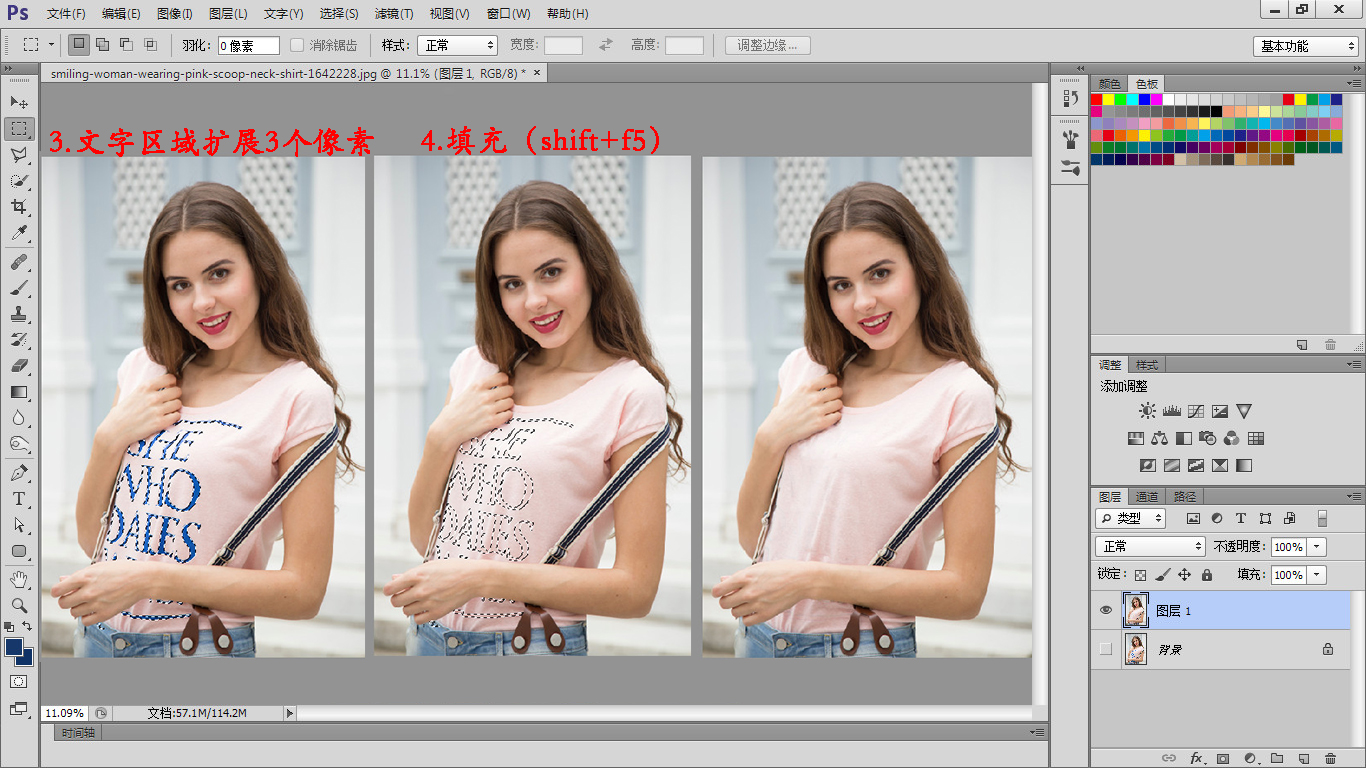
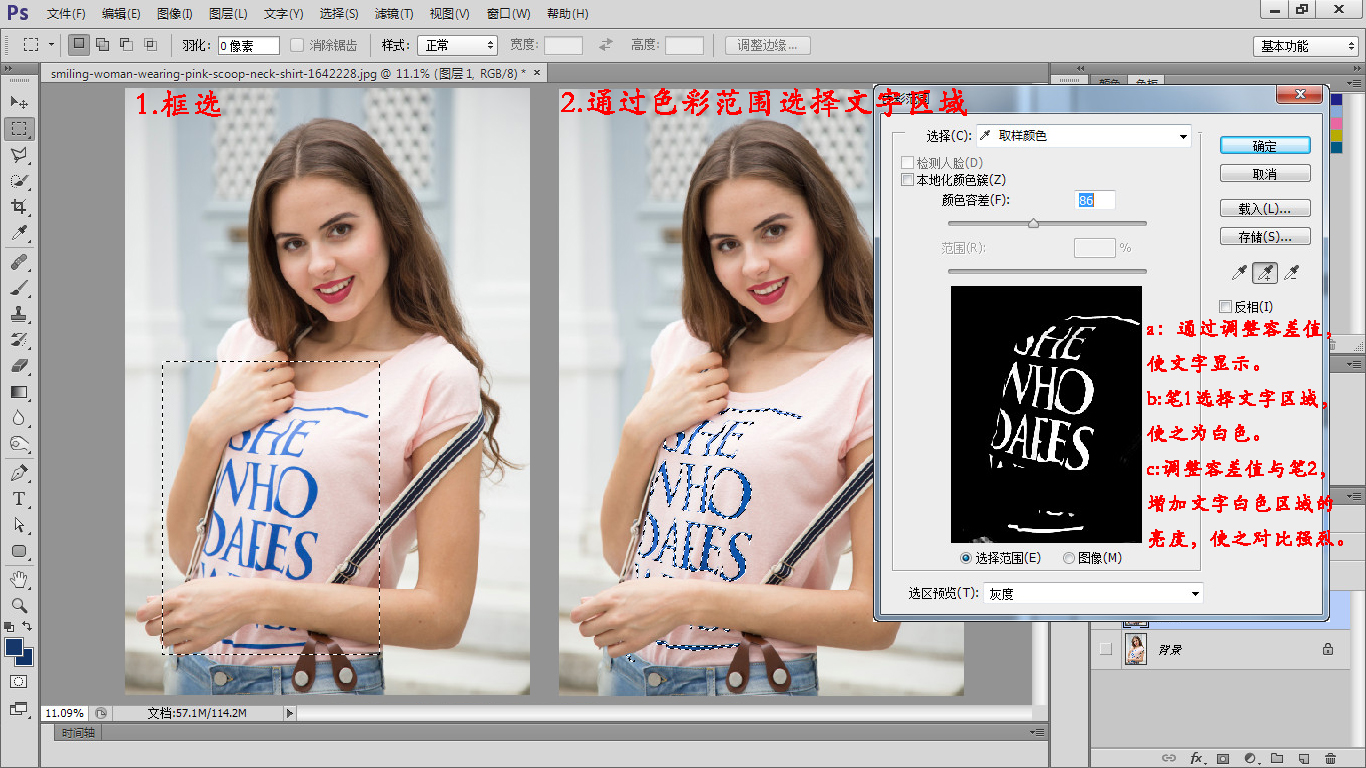
去除衣服上复杂文字
方法: 通过使用“色彩范围”选择文字区域,将范围扩展3个像素,使用“内容识别”填充,使用其他(印章、填充等)工具细微处理。

步骤:
1、框选文字(图像)区域,减小其他部分对文字区域的颜色干扰。
2、通过选择/色彩范围命令,调整容差值与三种笔,使去除区域与非去除区域形成强烈的对比(黑白对比,白色为选择区域)
3、通过设置选择/修改/扩展,设置扩展值为3像素,为了后面填充采集附近的颜色,便于填充。
4、通过编辑/填充(shift+f5),内容识别命令填充。